At this point, you should have a route setup leading to posts#index. If you’ll remember, posts is the URI and index is an action. You might be wondering what actions are.
If you come from a typical MVC background, you might think an action is just a controller.
I want you to clean any pre-conceived idea you have about actions. Go ahead; I’ll wait.
I want to start by giving you the definition of an action from the Hanami documentation:
An action is an endpoint that handles incoming HTTP requests for a specific route. In a Hanami application, an action is an object, while a controller is a Ruby module that groups them.
This type of thinking was confusing to me, at first. Next to models, it was one of the more confusing aspects of Hanami.
The crazy thing, though? It’s a neat concept that is simple to understand.
I think the easiest way for me to show you this concept is by converting a Ruby on Rails controller to a Hanami action.
Actions: Rails & Hanami
Let’s start with a Rails controller:
class PostsController < ApplicationController def index @posts = Post.all end def show @post = Post.find(params[:id]) endendThis code shows “posts.” It has two actions: index and show. The index action is responsible for showing all the posts and show is in charge of displaying a single post. Both you’ll find housed in one controller.
In Hanami, the previous example would be:
# apps/web/controllers/posts/index.rbmodule Web::Controllers::Posts class Index include Web::Action def call(params) # Get all the posts end endend# apps/web/controllers/posts/show.rbmodule Web::Controllers::Posts class Show include Web::Action def call(params) # Get the single post end endendI’ve commented out the actual code you would write for the action so I can show you have the action is setup.
1. Each Action is a Class
In the Ruby on Rails example, you had a single controller class with a method for each action. In Hanami, each action receives a class in a controller namespace.
module Web::Controllers::Posts class Index ... endendEach action having a class keeps the action “self-contained.” This setup allows the action to only concern itself with code and methods that are related to it. ‘
You might be wondering why it’s named Web::Controllers::Posts. That’s an excellent question I’d love to answer for you. Let’s split the module into three parts: Web, Controllers, and Posts.
Web is the name of the default application created by Hanami. A Hanami project can have multiple “apps.” If you had an “Admin” app within the same project, Controllers::Posts would clash with your “Web” action and could cause many issues for you.
Controllers is the folder structure controllers are stored in. apps/web/controllers/.
Posts is the folder nested inside the controllers folder where all the post actions live.
2. Each Action Includes a Module
Hanami actions mix in a Ruby module for their functionality, rather than inheriting its functionality from a parent class.
include Web::Action3. Each Action Responds to Call
You’ll notice in both Hanami examples above; there was one method in each example: a method definition for “call.”
def call(params) ...endWhen your action instantiates, the call method executes with one argument: the request parameters.
From Actions to Views
At this point, you still have that lonely route sitting in your routes file. It’s time to make it do something.
I want you to create the posts index action you saw earlier. However, I want you to use a Hanami generator.
First, now that you know how to write a route go to your routes file and delete the ‘/posts’ route you created in the last lesson. The generator will create one for you.
hanami generate action web posts#index
Once you’ve run the generator, you should see the route was created, along with the index action, index, view, template, and tests.
“Views, Templates, WTF?”
Views
You might be expecting a view to be an HTML file that can embed Ruby, like ERB or HAML. However, a view in Hanami is somewhat different.
A view is an object that’s responsible for rendering a template.
“So wait, a view is a Ruby object?” Yep! You nailed it.
Now, open up the view Hanami generated for you in apps/web/views/posts/index.rb.
module Web::Views::Posts class Index include Web::View endendAll the naming conventions you learned about the controller apply here too, except Controllers is swapped out with Views.
“Where is the damn HTML?” Okay, okay. Let’s get to that.
The view is responsible for setting up the data the template needs. Since we haven’t worked with real data yet, let’s create a method that returns the name of your blog.
module Web::Views::Posts class Index include Web::View def blog_name 'This Amazing Blog' end endendTemplates
With your “View” in place with some data, let’s access it in HTML.
Inside apps/web/templates/posts you will find the file index.erb. Open it up and fill it with the following:
<h1><%= blog_name %%></h1><p>Coming soon!</p>Here, you’ve used embedded Ruby by using the <%= %> tag. You’re calling the blog_name method the view has made available to the template. If you were to changeblog_name to name, you would receive an error.
Drumroll, Please
Start stretching because it’s almost time to pat yourself on the back. It’s time to view your work.
From the command line, go to the root of your Hanami project and start the server: bundle exec hanami server
Fire up your favorite version of Internet Explorer (okay, any browser is fine) and go to http://localhost:2300/posts
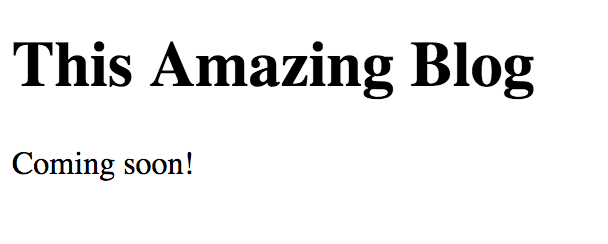
If things go according to plan, you will see the following:
Woo hoo! That should wrap it up for today. With the foundation set for routing, controllers, and views you’re ready to bring your new Hanami knowledge full-circle with Models and Database interaction.
As always, if you have any questions feel free to reach out!
Finally, make sure to provide your email below if you want to be the first notified of the next lesson.
- A Full Stack Ruby Web Framework – Learn Hanami #0
- Setup Hanami - Learn Hanami #1
- Hanami Routes - Learn Hanami #2
- Actions - Learn Hanami #3